Objects
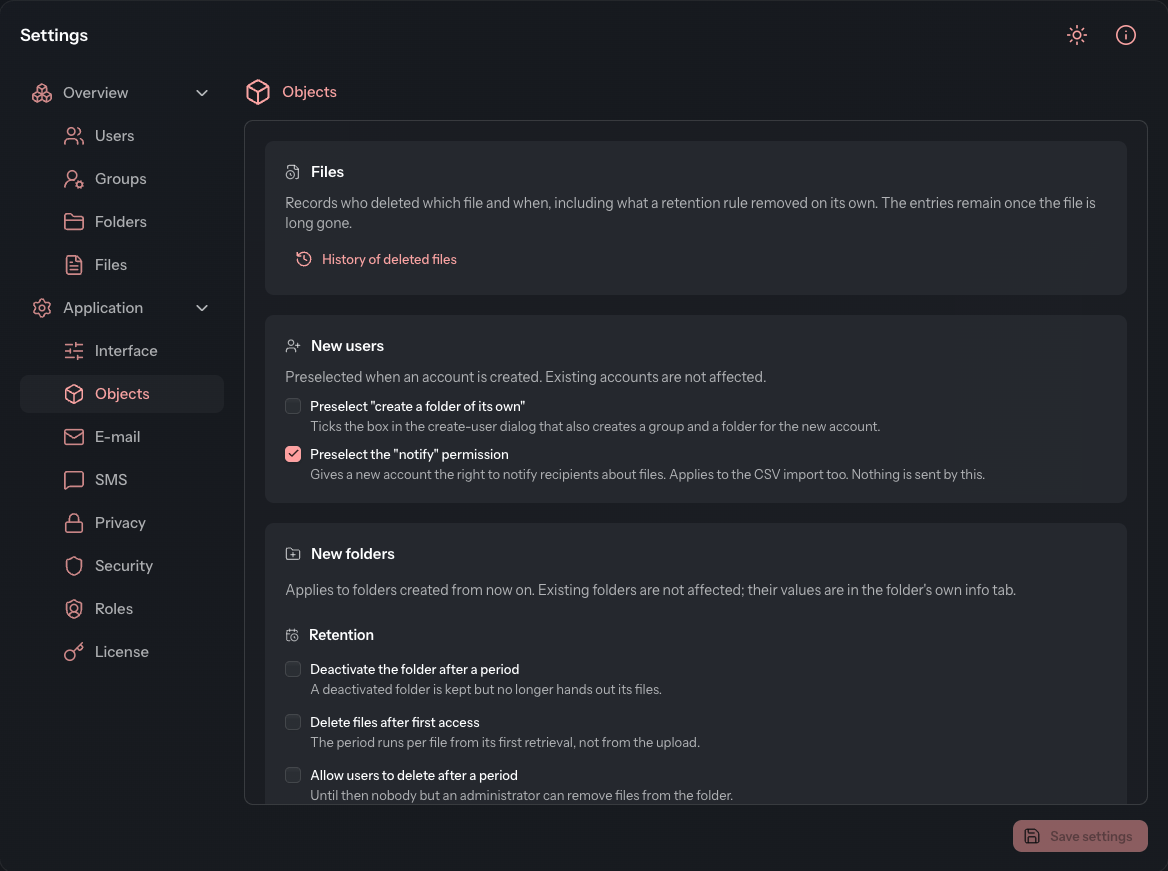
On this page you set the defaults that new users and new folders start with. It also holds the status templates, the subfolder templates and the history of deleted files.
Administrators only
Only administrators see this page. If Only super administrators are allowed to adjust program settings is switched on under Roles, only super administrators see it.
Change the defaults
- Open Settings › Application › Objects.
- Select or clear the checkboxes you need. For a period, enter the number of days or hours in the field that appears next to the checkbox.
- Click Save settings.
The defaults for new users and new folders only apply to what you create from now on. Existing accounts and folders do not change. You change the values of an existing folder in its details.
Files
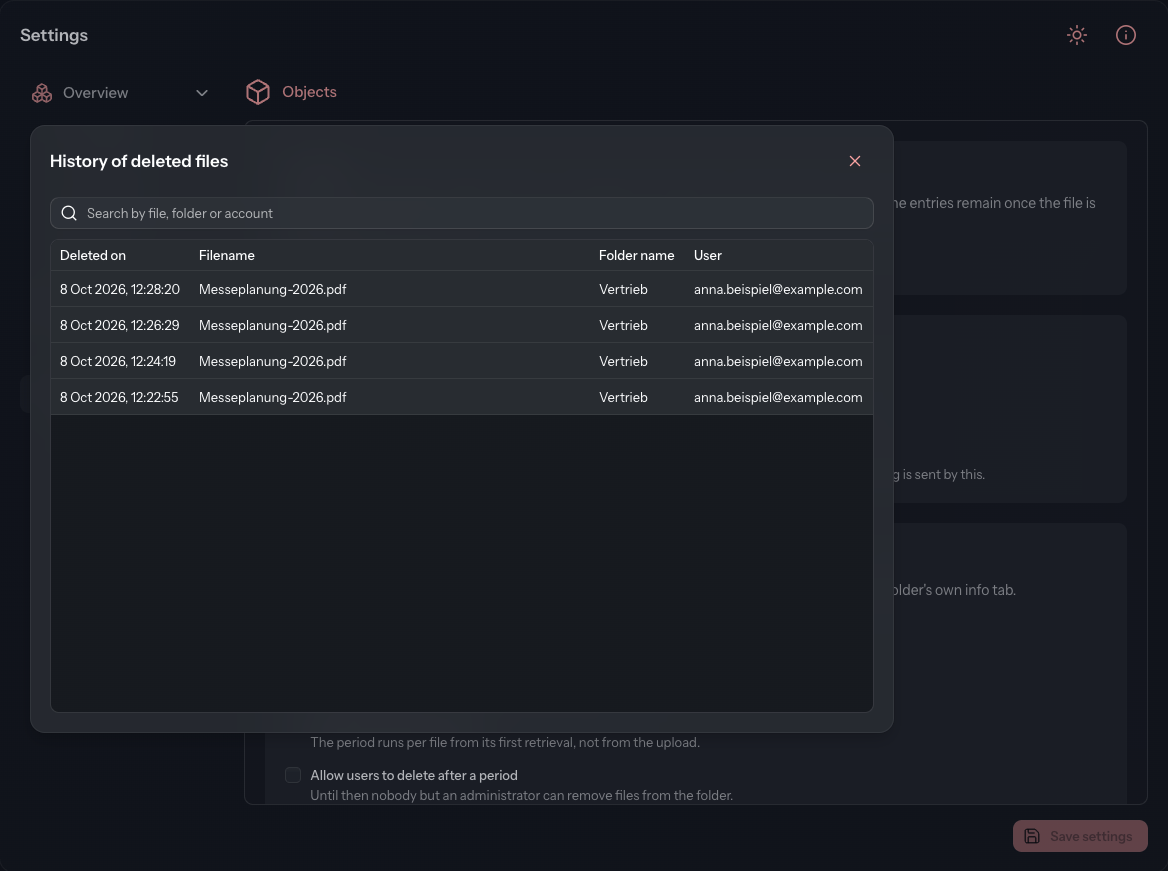
The Files card leads to the history of all deleted files. It records who deleted which file and when. Files that a retention rule removed automatically are listed too. The entries remain once the file is long gone.
Click History of deleted files to open the history. It shows the columns Deleted on, Filename, Folder name and User. Use the Search by file, folder or account field to find individual entries.
If the Large files add-on module is licensed, the card also holds a deletion rule:
| Setting | Meaning |
|---|---|
| Delete large files automatically | Deletes files uploaded through the Large files module after the number of Hours entered (1 to 8760). The period counts from the upload. |
Paid add-on module
Large files is a paid add-on module. Unlike the other defaults on this page, the deletion rule takes effect at once, including for files that are already uploaded. The License page shows whether the module is licensed.
New users
These defaults pre-tick the checkboxes when an administrator creates an account (see Create user).
| Setting | Meaning |
|---|---|
| Preselect "create a folder of its own" | Ticks the box in the Create user dialog that also creates a group and a folder of its own for the new account. |
| Preselect the "notify" permission | Gives a new account the right to notify recipients about files. Applies to the CSV import too. Nothing is sent by this. |
New folders
Retention
Each period starts switched off. The Days field (at most 3650) only appears once you select the checkbox.
| Setting | Meaning |
|---|---|
| Deactivate the folder after a period | A deactivated folder is kept, but no longer hands out its files. |
| Delete files after first access | The period runs for each file from its first retrieval, not from the upload. |
| Allow users to delete after a period | Until the period has passed, nobody but an administrator can remove files from the folder. |
Groups
| Setting | Meaning |
|---|---|
| Groups for new folders | These groups get access to every newly created folder. Without an entry, a new folder is visible only to whoever created it. |
| Preselect "create a group for this folder" | Ticks the box in the Create folder dialog that opens the group editor after the folder is created. Only administrators see that checkbox there. |
Status
| Setting | Meaning |
|---|---|
| Switch the done column on | New folders show the column in which a file is marked as done. |
Create status templates
A status is a named, coloured marker that can be given to a file. The status templates are copied onto every newly created folder. Existing folders keep their own. How statuses are used in a folder is described under Status templates.
- In the Status templates card, click Add status.
- Enter a Name and choose a Color.
- Click Save status.
Changes to the status templates take effect at once. You do not need Save settings for them. Use Edit and Delete in the row to change or remove a template. Folders that already have the status keep it.
Create subfolder templates
With subfolder templates, certain subfolders are created automatically under every new top-level folder. None are created under a new subfolder.
- In the Subfolder templates card, click Add template.
- Enter a Name and, if needed, choose Groups for the subfolder.
- Click Apply.
- Click Save settings.
Two further settings of the card apply to all templates:
| Setting | Meaning |
|---|---|
| Take over the parent folder's groups | The subfolder also receives the groups of the new parent folder. |
| Create the status templates here too | The subfolders receive the status templates as well. Otherwise only the parent folder does. |
If a template names a group that the person creating the folder may not assign, that one subfolder is not created. The parent folder and the other subfolders are still created, and the DocSecBox names the missing subfolder in a message.